How to Use an Electronic Blood Pressure Monitor at Home.

We always want to play it safe with our health to avoid illnesses. Whether we have an unhealthy blood pressure rate or not, checking our blood pressure is one of the ways to play it safe. Unfortunately, no matter how heavy or light our weekly schedule is, we can’t visit the hospital all the time to get our blood pressure checked.
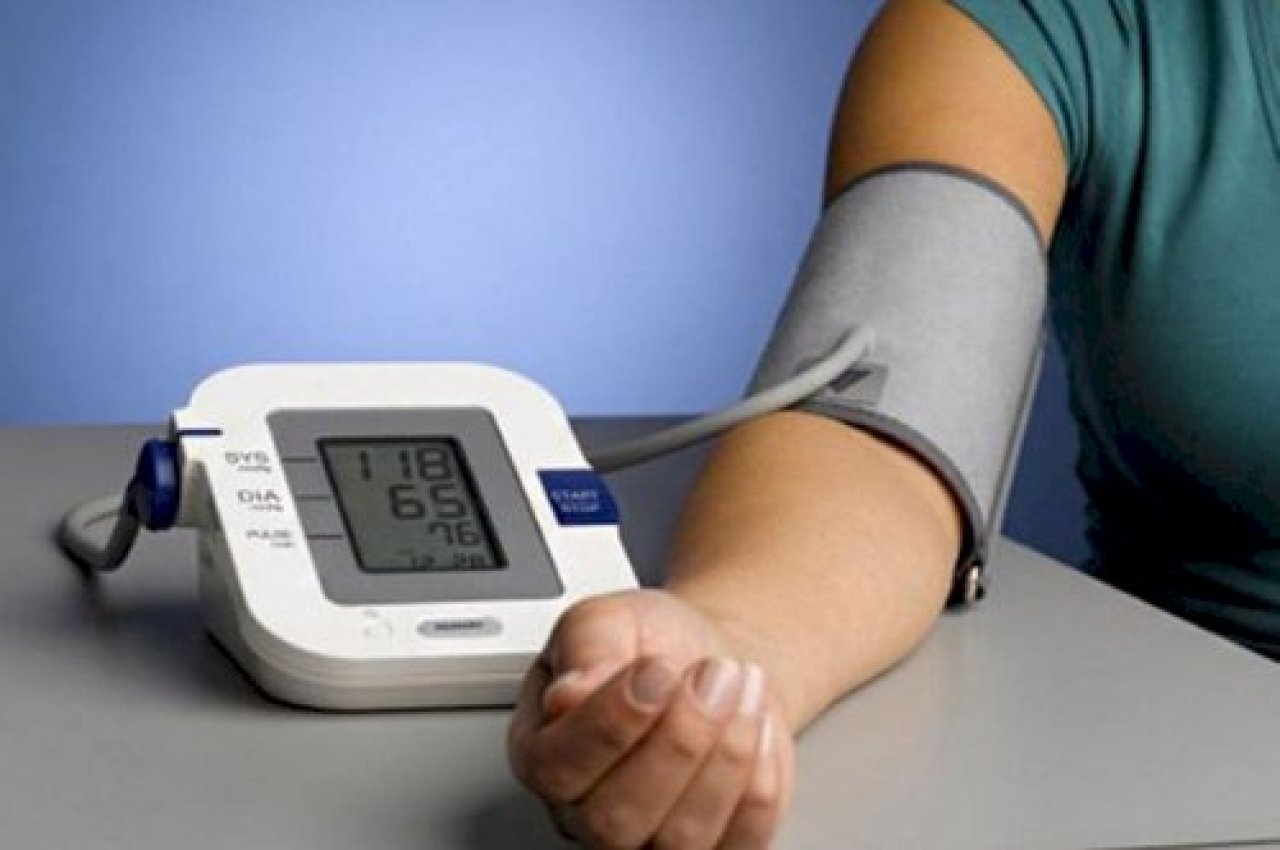
However, you can check your blood pressure by yourself in the comfort of your home if you use an electronic blood pressure monitor. An electronic blood pressure monitor is a device you can use to monitor your blood pressure, it is automatic and is easy to operate.
Here are easy steps on how to use an electronic blood pressure monitor in your home;
- Self-preparation
- Wearing the cuff
- Operating the monitor
- Switching off the monitor and removing the cuff
Preparation
It is important to note that there are certain things you must do in preparation to use an electronic blood pressure monitor. These things must be done to ensure accurate blood pressure readings.
- The first thing to do is to rest well for 15 minutes.
- Ensure you do not eat, drink or smoke while resting.
- Remove all clothing or jewellery that would interfere with cuff placement, let your arm be completely free so the cuff can fit and take accurate readings.
Wearing the Cuff
Firstly, place the monitor and the cuff on the table, then Insert the cuffing tube to the left side of the monitor. Make sure the cuff and monitor are on a solid surface like a table preferably a wooden one.
Pull open the cuff to the right to widen so it can fit your arm; next, insert your arm into the cuff. Ensure the cuff reaches your upper arm and not beyond it nor around your lower arm. The branded symbol of the cuff must be on your main artery, and it must be one inch above your elbow joint.
Pull the end of the cuff and wrap it around your arm not tightly but fasten it firmly. Put two fingers in the space between the cuff and your arm, this way you can ensure it’s not tight- just right. Rest your elbow on a hard surface with your wrist and palm facing upwards.
Operating the Monitor
Press the power button to start the monitor, the power button is the P button on the monitor. If you would like to store the results of the reading to show your doctor; press the memory button. The memory button is the M button on the monitor, once you’ve pressed it, then press the power button to save the action.
Once you’ve saved it, the cuff will automatically inflate and begin reading and displaying your blood pressure stats. Do try your best not to move while the process is ongoing. The cuff would then automatically deflate and it would present your Systolic and Diastolic numbers. Your Systolic number will appear first followed by the Diastolic number, for example, you’d see something like 120 then beneath it would be 80.
You can write the numbers down in case you need to use the readings but the monitor isn’t available to show your saved readings. Here’s how you should write the numbers: 120/80.
Switching Off the Monitor and Removing the Cuff
After you take the reading, press the power button (P) to turn off the monitor. Then unwrap the cuff, remove your arm and close the cuff. Unplug the cuffing tube from the left side of the monitor and store it safely for later use.
An Electronic Blood Pressure Monitor is a digital device with automatic functions, which makes it easy to use. With these easy steps you have learned, you should be able to use an electronic blood pressure monitor in your home without any difficulty or assistance.
If you would like to purchase an Electronic Blood Pressure Monitor, check out SellOff.ng today. If you found this post helpful kindly share it with your community.


